How to Control Chipsee PC Buzzer with Python and Browser
By Printfinn, last updated at 2023-04-13
Today let's see how we can control the builtin buzzer of a Chipsee industrial Pi PC.
So, in the last post we learned about how to control the backlight of Chipsee industrial Pi PC. We also built an HMI using the browser to adjust the backlight. We also learned that we can write and read a Linux text file to control the backlight.
Today let's use the same technique to control the buzzer. The basic idea is also writing to a Linux text file. To build an HMI, We will write a Python Flask server as the backend, an HTML file plus some Javascript in the browser as the frontend.
In this post we'll skip the Flask installation part, if you're not familiar with it, you can refer to the post on Start Python Flask Server: Hello World section. Also, when in doubt, don't forget search engine is a developer's friend.
Investigate Hardware Documentation
When I first got this Chipsee industrial Pi PC, I didn't know how to control these peripherals either. Thankfully, I found a software documentation online provided by Chipsee about this embedded PC: link to the doc. Under its "System Resource -> BUZZER" part, I found the solution. Chipsee engineers seem to want me to echo a 1 or a 0 to a Linux file /dev/buzzer.
$ echo 1 > /dev/buzzer # Turn on Buzzer
$ echo 0 > /dev/buzzer # Turn off Buzzer
Easy, eh?
So I tested it myself manually and Bi--, the buzzer is on. While it's too loud even in my home I'm afraid my mom would yell and ask me what happend, I quickly turned it off with echo 0 > /dev/buzzer. Phew!
The Python Server Controller
So it's clear that if I can build a simple HTML page to invoke a Python script to write a "1" or a "0" to this /dev/buzzer file, I'll be able to control the buzzer on this touch screen. We can ask a Flask server to do this:
Let's create an app.py file, add a Flask route and action:
# /app.py
from flask import Flask, render_template
from flask import request

app = Flask(__name__)

@app.route("/buzzer")
def buzzer():
    return render_template('buzzer.html')
The Browser Part
This means we can visit localhost:5000/buzzer to render an HTML file called buzzer.html. But we haven't added the HTML file, so let's add an HTML first in the buzzer.html under templates folder (create a template folder if you don't have one, it's the Flask's convention of where to store HTML templates):
# templates/buzzer.html
<!doctype html>
<html>

<head>
    <title>Buzzer | Chipsee Industrial PC Demo</title>
    <link rel="stylesheet" href="{{ url_for('static', filename='css/bootstrap.min.css') }}">
    <link rel="stylesheet" href="{{ url_for('static', filename='css/style.css') }}">
</head>

<body class="dark-bg sticky-body">
    <div class="container">
        <div class="d-flex align-items-center justify-content-center" style="min-height: 90vh;">
            <div>
                <div class="row justify-content-center">
                    <div class="col-auto buzzer-desc">Buzzer</div>
                </div>
                <div class="row justify-content-center">
                    <div class="col-auto form-check form-switch d-flex justify-content-center" style="font-size: 8em">
                        <input class="form-check-input my-2" type="checkbox" role="switch" id="buzzer-switch">
                    </div>
                </div>
                <div class="row justify-content-center">
                    <div class="col-auto buzzer-btn" id="buzzer-btn"></div>
                </div>
            </div>
        </div>
    </div>
</body>
To start the Flask server, run:
$ flask run --host=0.0.0.0 --debugNow you can visit this HTML, but it's just an ugly checkbox and a line of text "buzzer", in a weird position. We haven't added any CSS styles for it. Now let's add some CSS styles to make the page look better. Because the CSS is complex, I will skip how to write these styles, but just add the files to this project. Anyone who is familiar with frontend programming (know the CSS basics) should be able to do this by themselves.
You should copy and paste two files to your project from our demo, the source code of these CSS files are on the Github: in this folder, you need the bootstrap.min.css file and style.css file. Copy and paste the content to your project's static/css folder. You should create this folder if you don't have one (A css folder inside a static folder). In the end, you should have static/css/bootstrap.min.css and static/css/style.css with the content of our demo code.
Now let's visit localhost:5000/buzzer again on the Chromium browser of our Chipsee industrial Pi. You should see your app's webpage like this:
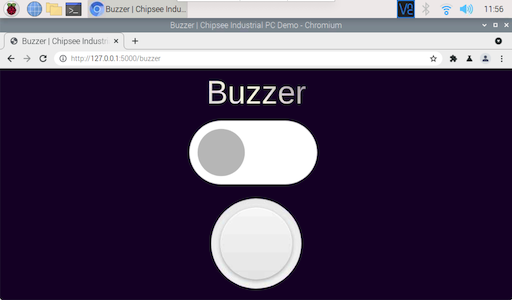
That's how our page will look like. You can try turning on and off the buzzer switch or touch the round button, but nothing will happen at the moment. Because we haven't told the switches what to do when we touch them.
Write to /dev/buzzer file with Python
Let's get back to our Flask backend. At the beginning we tried to write to a Linux file with echo 1 > /dev/buzzer, now we will replicate this with a Python script. How? With Python's with open & write.
We will create a folder named models in the root folder of our project, and then create a file named buzzer.py. You should have models/buzzer.py in your project folder.
Then let's create a Buzzer class and write some really simple code, just write "1" or "0" to the Linux text file.
# models/buzzer.py
class Buzzer(object):
    ON = "1"
    OFF = "0"

    def __init__(self):
        self.device = "/dev/buzzer"

    def set_to(self, status):
        if status == Buzzer.ON:
            return self.set_on()
        elif status == Buzzer.OFF:
            return self.set_off()
        else:
            return False

    def set_on(self):
        try:
            with open(self.device, 'w') as f:
                f.write(Buzzer.ON)
                return True
        except PermissionError as e:
            return "[PermissionError]: Buzzer device cannot be found or cannot be operated."
        except FileNotFoundError as e:
            return "[FileNotFoundError]: Buzzer device cannot be found on this machine."

    def set_off(self):
        try:
            with open(self.device, 'w') as f:
                f.write(Buzzer.OFF)
                return True
        except PermissionError as e:
            return "[PermissionError]: Buzzer device cannot be found or cannot be operated."
        except FileNotFoundError as e:
            return "[FileNotFoundError]: Buzzer device cannot be found on this machine."
The code explains itself quite well. In general, you will need to call a buzzer.set_to("1") or buzzer.set_to("0") in another place to turn the buzzer on or off.
And our app.py will be this place! Under our first and only route @app.route("/buzzer"), let's add another route and method:
# app.py
from models.buzzer import Buzzer
dev_buzzer = Buzzer()

@app.route('/api/buzzer', methods=['POST'])
def api_buzzer():
    req = request.json
    new_status = str(req['buzzer'])
    msg = dev_buzzer.set_to(new_status)
    if msg == True:
        return { 'status': 'Success', 'msg': new_status }
    return { 'status': 'Error', 'msg': msg }
This code block means we will accept a POST request from our browser, which has a parameter "buzzer" and the new status we want the buzzer to be. Then this code block will invoke the buzzer.py 's corresponding method and write those Linux text files to control our buzzer.
Now we can ask the browser to send these requests to our Flask backend for us, but before implementing that, we can also test our backend in the terminal with the cURL program. You should already have that installed on your Linux operating system. I'll give you an example to ask cURL to invoke our /api/buzzer action.
curl --data '{"buzzer":"1"}' http://localhost:5000/api/buzzer --header "Content-Type:application/json"
curl --data '{"buzzer":"0"}' http://localhost:5000/api/buzzer --header "Content-Type:application/json"
The first line of the bash script turns on our buzzer by POSTing a JSON string to our /api/buzzer route, with an "on" instruction. The second obviously turns it off. By running the first commands, you should hear your Chipsee industrial Pi PC's buzzer Bi--. (Don't do this when other people are sleeping!)
Add Javascript to Our Webpage
Now we can be sure our backend works fine, when we give it the correct instruction, it can turn on or off the buzzer. But we were using cURL, now let's replicate this process with Javascript in the browser. We want to touch our Chipsee PC's panel to turn on or off the switches, then we want to hear the Bi--.
Open the templates/buzzer.html file, add the following code to the end of the file:
# templates/buzzer.html

<script>
    document.oncontextmenu = function (event) {
        // When pushing buzzer button, a long press will call out browser context menu(light mouse right click), this will forbid it.
        event.preventDefault();
        event.stopImmediatePropagation();
        return false;
    };
    class BuzzerButton {
        constructor() {
            this.endPoint = "/api/buzzer";
            let btn = document.querySelector("#buzzer-btn")
            btn.addEventListener('touchstart', (e) => {
                this.setBuzzer(1);
            });
            btn.addEventListener('touchend', (e) => {
                this.setBuzzer(0);
            })
        }

        setBuzzer(value) {
            fetch(this.endPoint, {
                method: 'POST', // or 'PUT'
                headers: {
                    'Content-Type': 'application/json',
                },
                body: JSON.stringify({ 'buzzer': value }),
            })
                .then((response) => response.json())
                .then((data) => {
                    if (data['status'] === 'Success') {
                        console.log('Success:', data);
                    } else {
                        throw (data['msg'])
                    }
                })
                .catch((error) => {
                    console.error('Error:', error);
                });
        }
    }
    class BuzzerSwitch {
        constructor() {
            this.endPoint = "/api/buzzer";
            document.querySelector("#buzzer-switch").onchange = (e) => {
                let checked = e.target.checked;
                if (checked) {
                    this.setBuzzer(1);
                } else {
                    this.setBuzzer(0);
                }
            }
        }

        setBuzzer(value) {
            fetch(this.endPoint, {
                method: 'POST', // or 'PUT'
                headers: {
                    'Content-Type': 'application/json',
                },
                body: JSON.stringify({ 'buzzer': value }),
            })
                .then((response) => response.json())
                .then((data) => {
                    if (data['status'] === 'Success') {
                        console.log('Success:', data);
                    } else {
                        throw (data['msg'])
                    }
                })
                .catch((error) => {
                    console.error('Error:', error);
                });
        }
    }
    let buzzerSwitch = new BuzzerSwitch()
    let buzzerBtn = new BuzzerButton()
</script>
You can of course put these in a separate JS file, that's good. But for educational purposes, I'll just leave them inside HTML.
The code does three things:
First, it tells the buzzer switch what to do when it is turned on or off.
Second, it tells the buzzer button what to do when it is pressed or released.
Third, because this is a browser, long pressing the button will call the context menu out (like a right click on the browser's any page with a mouse), we need to forbid this context menu from displaying.
The code should explain itself if you are familiar with Javascript. They simply add several event listeners to the button or switch. If an event is triggered, like a 'touchstart' or 'touchend' or 'checked', the JS then initiates a HTTP POST request to our Flask backend server with a JSON object that our '/api/buzzer' route understands.
Test Your Buzzer HMI
Now the code is complete, you can play around with the buzzer button or switch in the browser. When you turn on the switch, you should hear constant Bi--. This switch acts as a always-on, always-off switch.
The buzzer button acts as a contact switch, only when you're touching or pressing the button should you hear the Bi--. Imagine you have a lifting machine and you're adjusting the angle of the arm and the height of the hook. And when you release the button, the Bi-- should stop immediately.
Final Code
In the end, the code should look like this (except the two CSS files, which we didn't touch at all):
# /app.py
from flask import Flask, render_template
from flask import request

from models.buzzer import Buzzer
dev_buzzer = Buzzer()

app = Flask(__name__)

@app.route("/buzzer")
def buzzer():
    return render_template('buzzer.html')

@app.route('/api/buzzer', methods=['POST'])
def api_buzzer():
    print(request)
    req = request.json
    new_status = str(req['buzzer'])
    msg = dev_buzzer.set_to(new_status)
    if msg == True:
        return { 'status': 'Success', 'msg': new_status }
    return { 'status': 'Error', 'msg': msg }
# models/buzzer.py
class Buzzer(object):
ON = "1"
OFF = "0"
def __init__(self):
self.device = "/dev/buzzer"
def set_to(self, status):
if status == Buzzer.ON:
return self.set_on()
elif status == Buzzer.OFF:
return self.set_off()
else:
return False
def set_on(self):
try:
with open(self.device, 'w') as f:
f.write(Buzzer.ON)
return True
except PermissionError as e:
return "[PermissionError]: Buzzer device cannot be found or cannot be operated."
except FileNotFoundError as e:
return "[FileNotFoundError]: Buzzer device cannot be found on this machine."
def set_off(self):
try:
with open(self.device, 'w') as f:
f.write(Buzzer.OFF)
return True
except PermissionError as e:
return "[PermissionError]: Buzzer device cannot be found or cannot be operated."
except FileNotFoundError as e:
return "[FileNotFoundError]: Buzzer device cannot be found on this machine."# templates/buzzer.html
<!doctype html>
<html>
<head>
<title>Buzzer | Chipsee Industrial PC Demo</title>
<link rel="stylesheet" href="{{ url_for('static', filename='css/bootstrap.min.css') }}">
<link rel="stylesheet" href="{{ url_for('static', filename='css/style.css') }}">
</head>
<body class="dark-bg sticky-body">
<div class="container">
<div class="d-flex align-items-center justify-content-center" style="min-height: 90vh;">
<div>
<div class="row justify-content-center">
<div class="col-auto buzzer-desc">Buzzer</div>
</div>
<div class="row justify-content-center">
<div class="col-auto form-check form-switch d-flex justify-content-center" style="font-size: 8em">
<input class="form-check-input my-2" type="checkbox" role="switch" id="buzzer-switch">
</div>
</div>
<div class="row justify-content-center">
<div class="col-auto buzzer-btn" id="buzzer-btn"></div>
</div>
</div>
</div>
</div>
</body>
<script>
document.oncontextmenu = function (event) {
// When pushing buzzer button, a long press will call out browser context menu(light mouse right click), this will forbid it.
event.preventDefault();
event.stopImmediatePropagation();
return false;
};
class BuzzerButton {
constructor() {
this.endPoint = "/api/buzzer";
let btn = document.querySelector("#buzzer-btn")
btn.addEventListener('touchstart', (e) => {
this.setBuzzer(1);
});
btn.addEventListener('touchend', (e) => {
this.setBuzzer(0);
})
}
setBuzzer(value) {
fetch(this.endPoint, {
method: 'POST', // or 'PUT'
headers: {
'Content-Type': 'application/json',
},
body: JSON.stringify({ 'buzzer': value }),
})
.then((response) => response.json())
.then((data) => {
if (data['status'] === 'Success') {
console.log('Success:', data);
} else {
throw (data['msg'])
}
})
.catch((error) => {
console.error('Error:', error);
});
}
}
class BuzzerSwitch {
constructor() {
this.endPoint = "/api/buzzer";
document.querySelector("#buzzer-switch").onchange = (e) => {
let checked = e.target.checked;
if (checked) {
this.setBuzzer(1);
} else {
this.setBuzzer(0);
}
}
}
setBuzzer(value) {
fetch(this.endPoint, {
method: 'POST', // or 'PUT'
headers: {
'Content-Type': 'application/json',
},
body: JSON.stringify({ 'buzzer': value }),
})
.then((response) => response.json())
.then((data) => {
if (data['status'] === 'Success') {
console.log('Success:', data);
} else {
throw (data['msg'])
}
})
.catch((error) => {
console.error('Error:', error);
});
}
}
let buzzerSwitch = new BuzzerSwitch()
let buzzerBtn = new BuzzerButton()
</script>Conclusion
That's quite a lot of work! Hopefully your code works and works fine, if not don't hesitate to ask me.
To wrap up, we built an HMI to control the buzzer of the Chipsee industrial Pi PC. We made it by writing to a Linux file with Python, and we asked our webpage to invoke this Python script with HTTP POST requests. The request is triggered any time when the switches on our webpage is turned on or off, or is pressed or released.
So that's it, now you can control your Chipsee PC's buzzer with an HMI! (Pro tip: don't test this when other people are sleeping!)